By Alan Shepard
Wax benches can be expensive. If you are capable of some metalwork it is feasible to make your own. The bench is far from perfect and no doubt you will be able to add your own improvements. However it weighs only 1830g and can save a lot of hassle if you end up in a place without a wax room. The total cost of the parts was about £40 (in 2006).
The usual remarks are in order about removing sharp edges from cuts, using goggles and safety equipment as required and not using power tools, unless you know how to use them safely.
The drawings are not to scale so stick with the dimensions given, not how it looks.
If you construct the bench and find that changes should be made to these instructions, please contact me. This is the second version of the bench. The first version proved hazardous to users who had soft skis. These flexed and allowed the hands of the user to come too close to the top of the Middle Legs.
First purchase the following items. I bought them from B&Q and I have included their reference numbers, but you will be able to get the material needed elsewhere if you wish.
If 6mm screws, nuts, etc are not available then substitute them with 5mm parts and drill the holes accordingly. If the 16mm square tube is available in 2m lengths, it may work out cheaper to buy two of these instead of 4 x 1m lengths.
| Quantity | Description | Price | Total |
| 1 | 20mm x 20mm x 20mm x 2m x 1.5mm Aluminium U 2004.5242 | £7.78 | £7.78 |
| 1 | 20mm x 20mm x 1m x 1.5mm Aluminium square tube 2005.5251 | £5.38 | £5.38 |
| 5 | 16mm x 16mm x 1m x 1.5mm Aluminium square tube 2005.5253 | £3.98 | £19.90 |
| 1 | M8 x 1m Screwed steel rod 2010.7164 | £1.38 | £1.38 |
| 1 | M4 Plain steel rod 2001.61954 | £0.99 | £0.99 |
| 1 | 10mm x 1m x 1mm Round aluminium tube 2005.5203 | £2.60 | £2.60 |
| 1 pk | 8mm Flat washers AVF 058492 | £0.96 | £0.96 |
| 1 pk | 8mm Hexagonal nuts AVF 031793 | £1.30 | £1.30 |
| 1 pk | 6mm x 30mm Pan head Machine screws AVF | £1.30 | £1.30 |
| 1 pk | 6mm x 50mm Pan head Machine screws AVF 069697 (5pc) | £1.30 | £1.30 |
| 1 pk | 6mm x 60mm Pan head Machine screws AVF 069673 (4pc) | £1.30 | £1.30 |
| 1 pk | 6mm Flat washers AVF 064975 (60pc) | £0.38 | £0.38 |
| 1 pk | 8mm Wing nuts | £1.30 | £1.30 |
| 2 pk | 6mm Wing nuts (6pc) | £1.30 | £2.60 |
| 1 pk | 6mm Spring washers AVF 065095 (30pc) | £1.30 | £1.30 |
| 1 pk | 8mm Spring washers AVF 065101 (20pc) | £1.30 | £1.30 |
| 140mm | 16mm x 2mm mild steel | £0.30 | £0.30 |
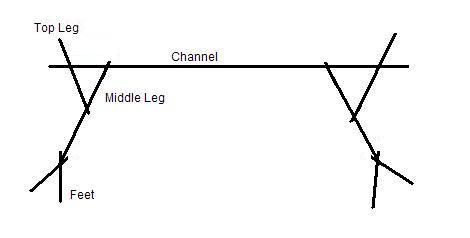
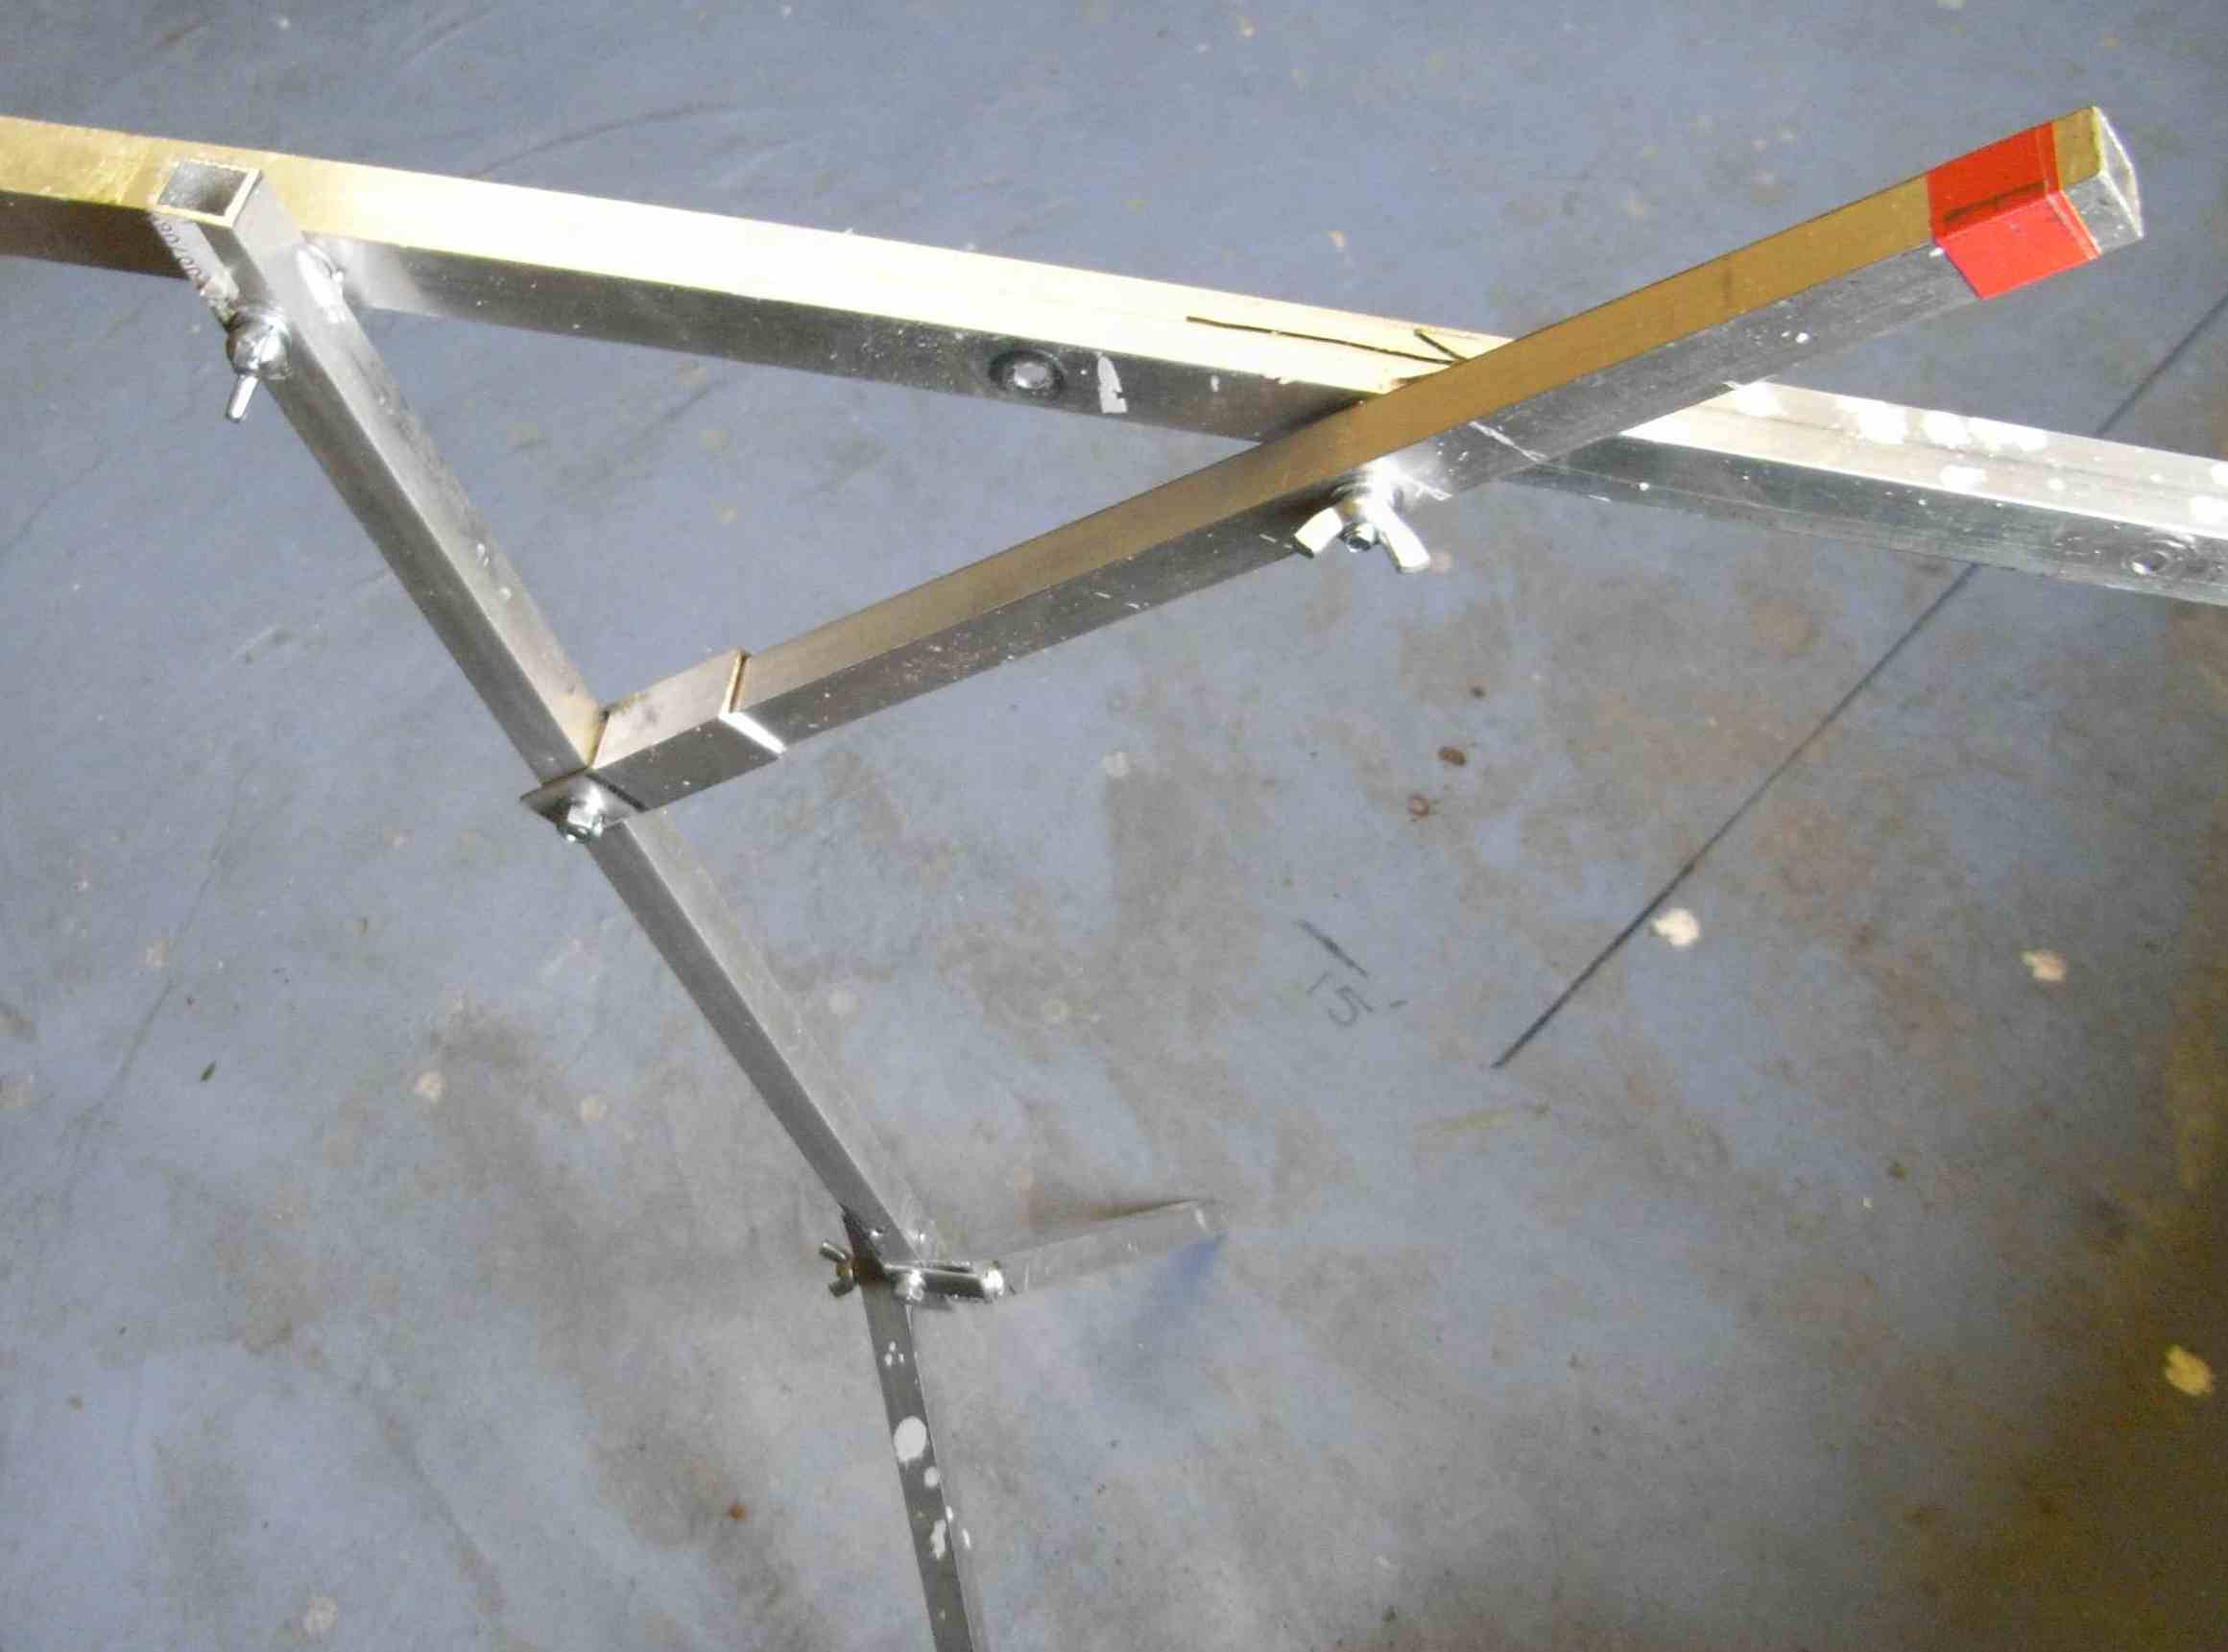
The wax bench consists of feet, middle legs, top legs and channel
The bench opens out from a relatively compact form, the top legs sit in sockets fitted to the middle legs and the feet open out to form a Vee and are held there by stops.
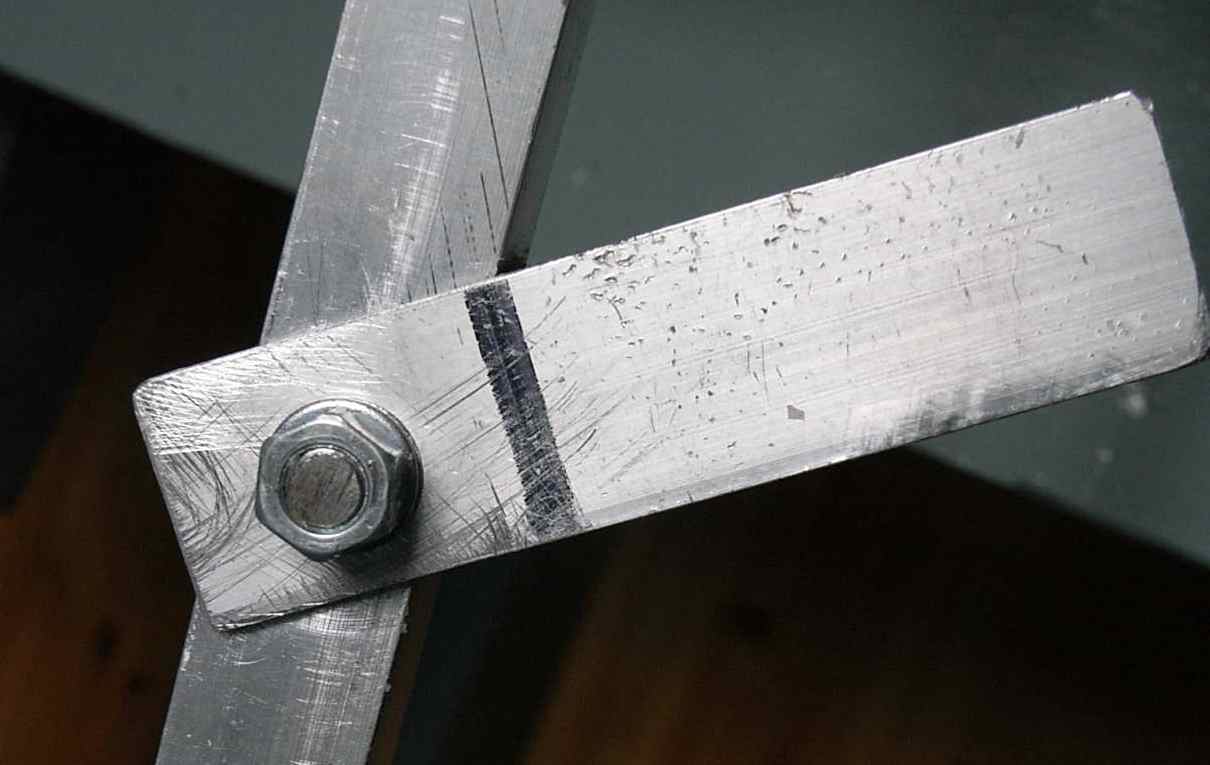
A 4mm length of steel bar is fixed by a screw to the centre of the channel. this is called the Binding Bar. When the bench is erected, this is rotated out at right angles to the channel.
The skis tips and tails rest on ski support bars which drop onto the tops of the top legs. When the ski bindings are clipped onto the Binding Bar, the spring of the ski adds to the bench rigidity. For best performance, both skis should be fitted, one on either side of the channel.
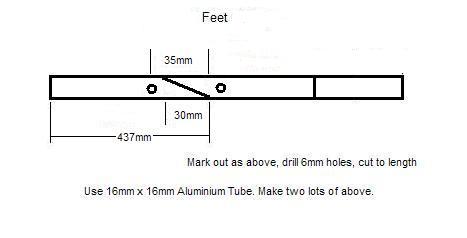
Try and make the angled part of the feet and holes accurately to save filing later on.
Although not shown on the sketch below, the dimensions for both feet are the same.
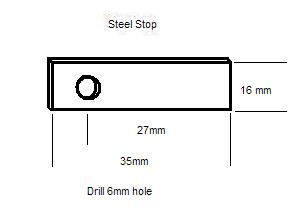
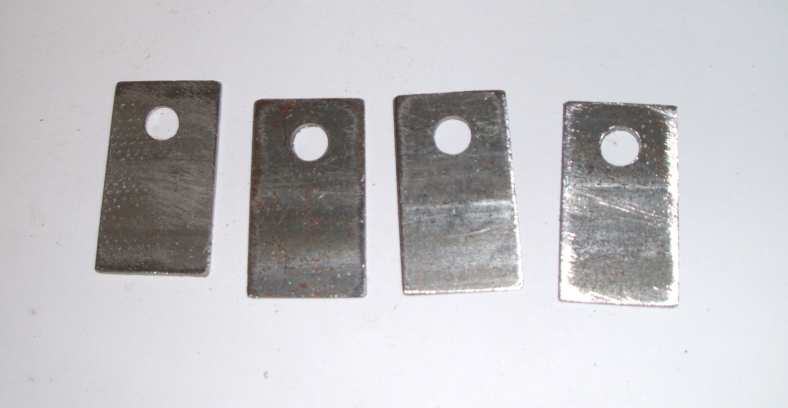
The feet are held in the open position by stops. Make four stops.
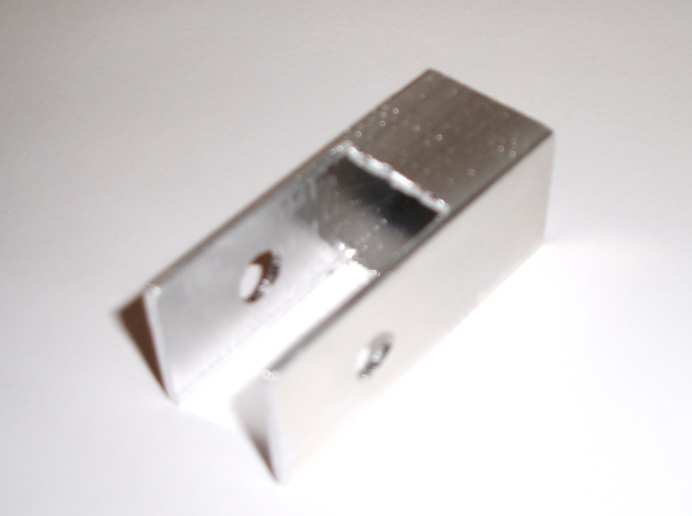
The picture below shows the completed stops.
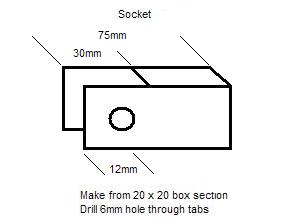
Make two sockets.
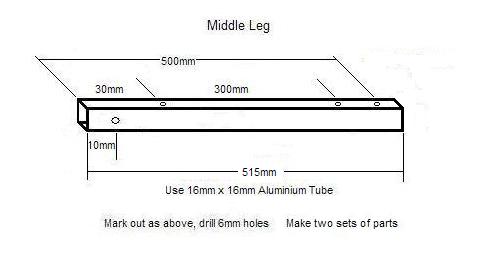
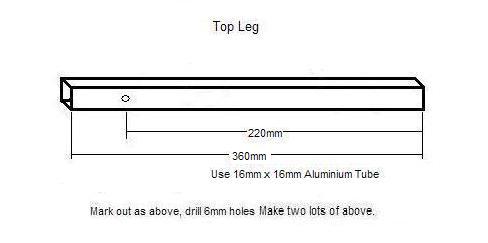
Make two top legs.
Find the length (L) of your shorter, probably skate, skis. All measurements are in mm.
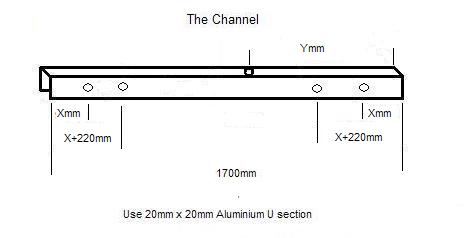
The distance between the holes for the Top Legs is L-400mm so provided you are using the same channel length as me (1700), drill 6mm holes in the sides of the channel at X=(1700-L+400)/2 mm from each end of the channel. Drill 6mm holes for the Middle Legs a further 220mm nearer the centre.
Measure the distance (B) from the tail of the ski to the part of the ski binding that clamps the toe bar of the ski boot. Drill an 8mm hole in the top of the channel at Y=B-80 mm from one end of the channel.
If you wish to use the bench for different lengths of skis, additional pairs of holes
should be drilled in the channel for the Middle and Top legs. In addition, some
extra holes in the centre of the channel for the binding bar should be drilled
to allow for variations in binding positions.
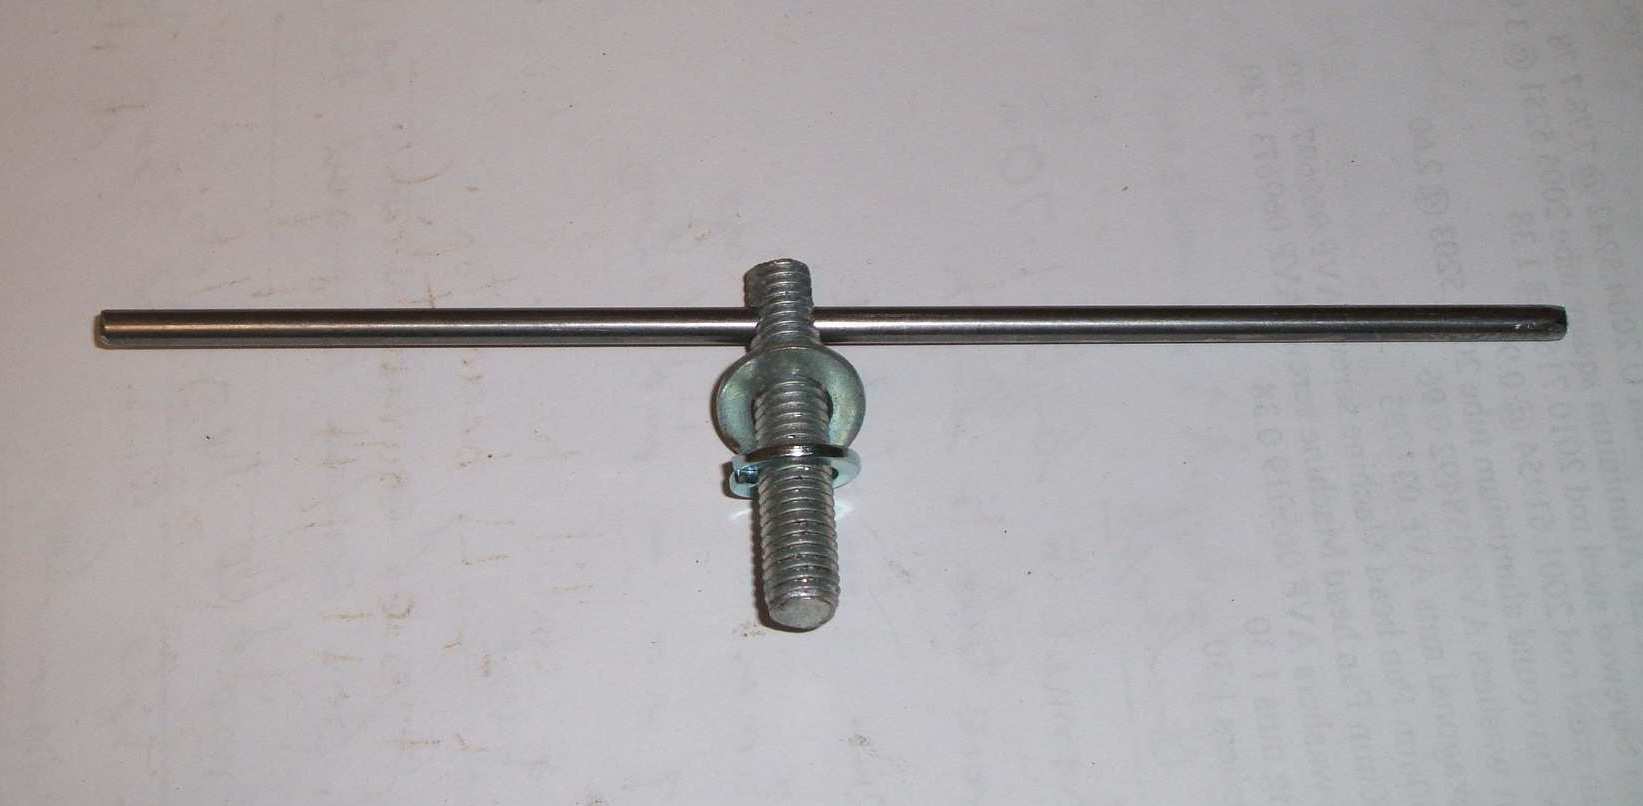
Cut 40mm of 8mm screwed rod
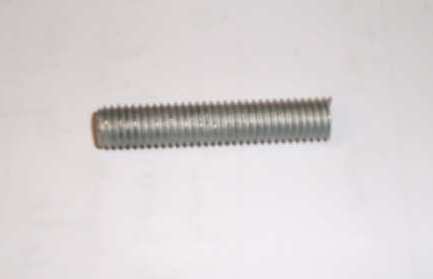
File a flat at one end and drill 4mm hole through the rod
Cut 160mm of plain steel M4 rod and push though hole.
Add flat and spring washers
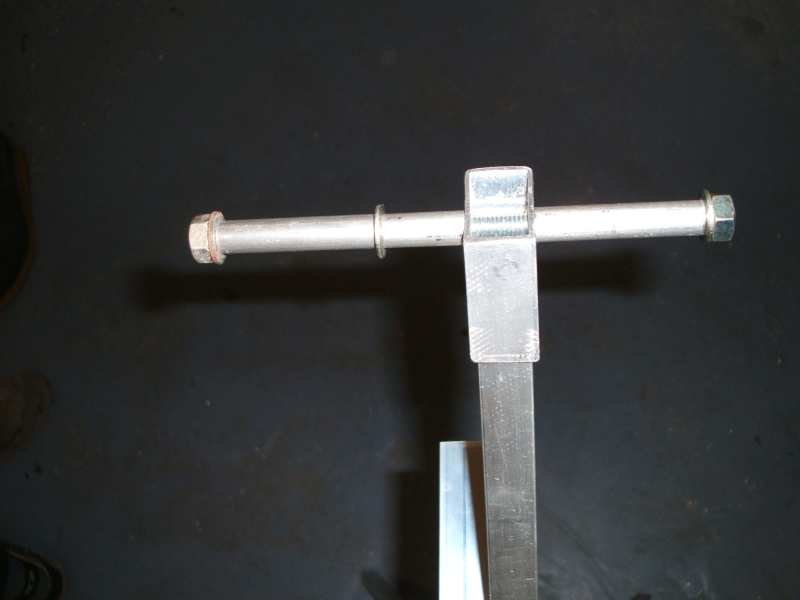
Check the width of the tail and toe of your skis.
If they are wider than 45mm, increase the 45mm dimension and the total length of the bar to suit
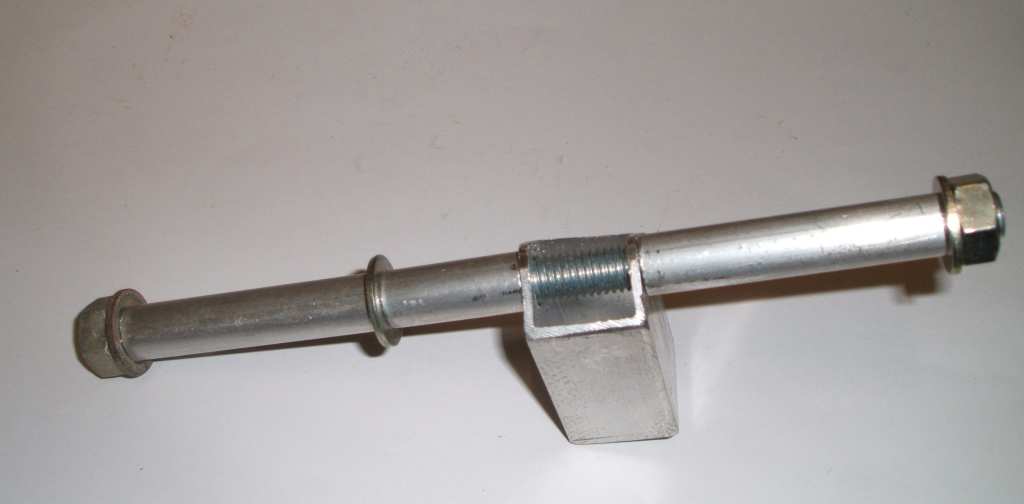
Cut 160mm of 8mm screwed rod
Cut 2 x 45mm of 10mm round aluminium tube
Cut 1 x 25mm of 10mm round aluminium tube
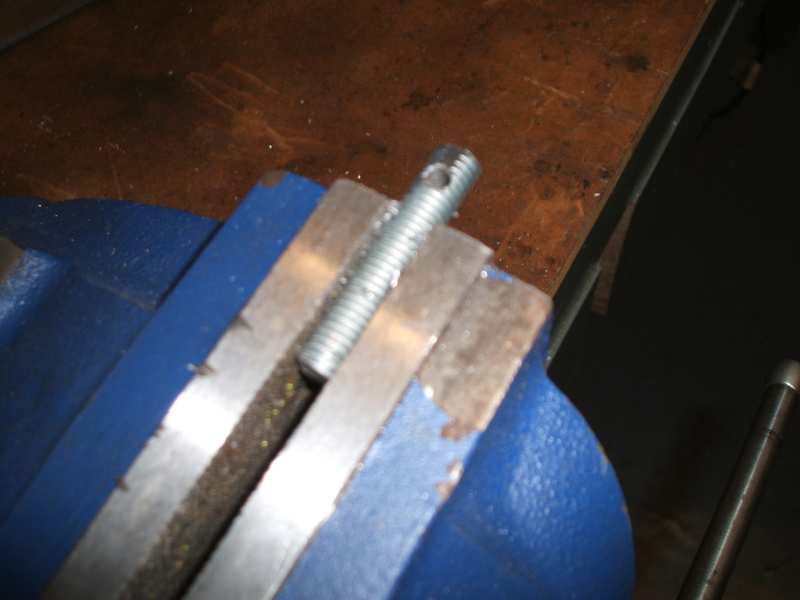
Cut 55mm of 20mm x 20mm square aluminium tube. Cut one end with a 90 degree peak
Drill 8mm hole as close as possible to the tip of the peak.
Make two sets of these parts
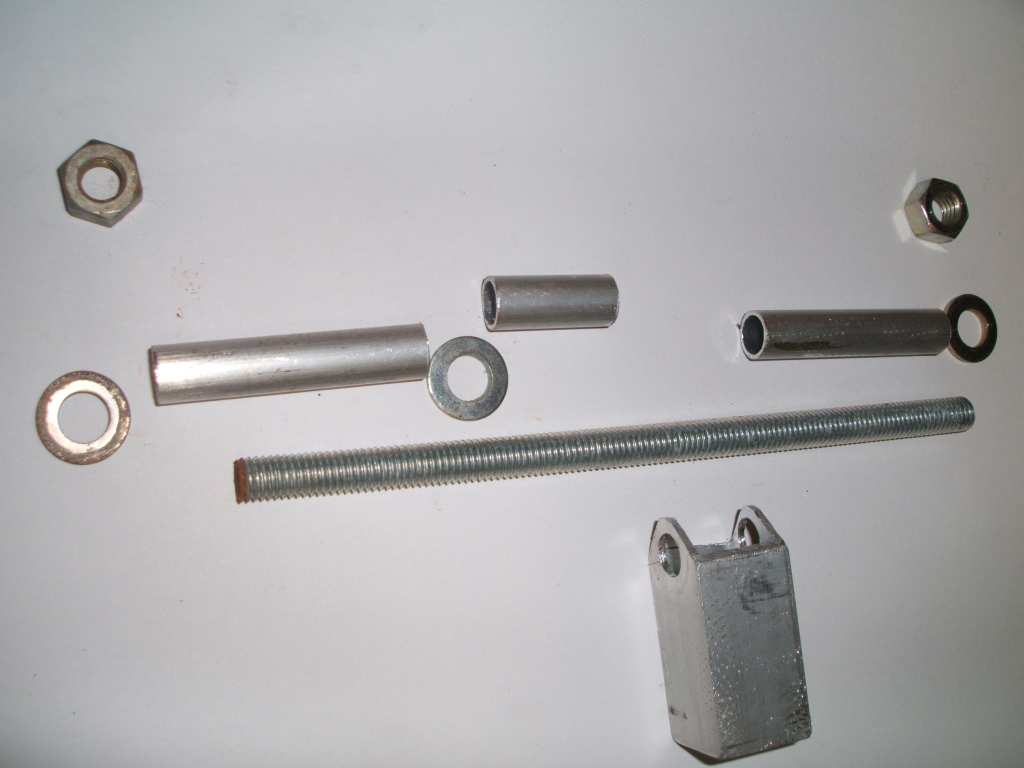
Use 8mm washers and nuts to make up the bar sets. Make up both with the same 'handedness'
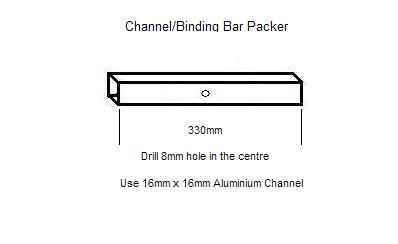
Place binding bar into top centre hole of channel

Put Binding Bar packer underneath, fit into channel, add washers and wing nut
Assemble the stops on the middle leg
Add the feet to the middle leg
The picture below shows the stops fitted and the feet resting against them.
Adjust the top of the feet, where they meet the stops, so that the feet open out equally on both sides of the middle leg. Do this by filing the angle at the top of the feet
Bolt the top legs to the channel on opposite sides of the channel
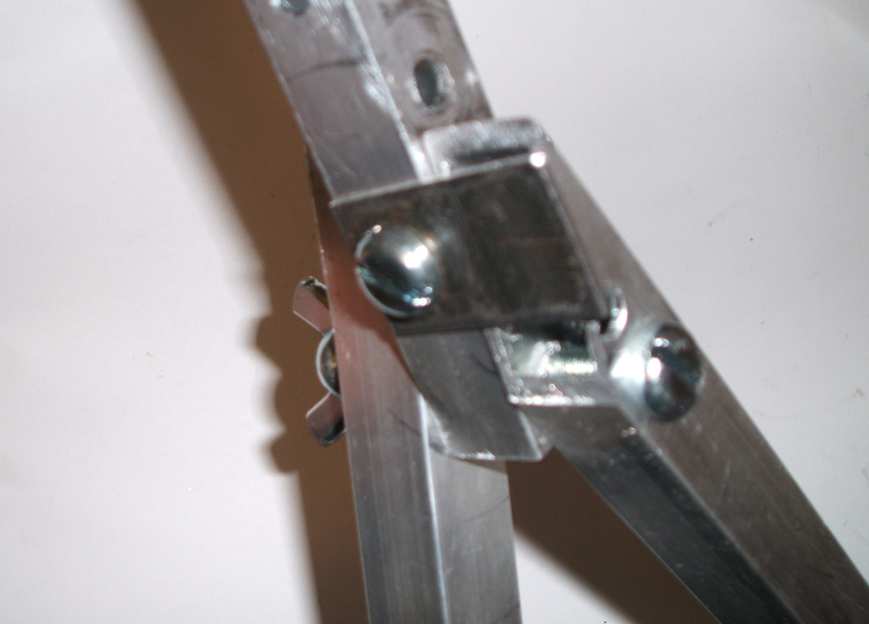
Bolt the sockets to the middle legs with 6mm x 30mm screws. Leave the socket loose enough to be able to move it a little, to help when fitting top leg into socket
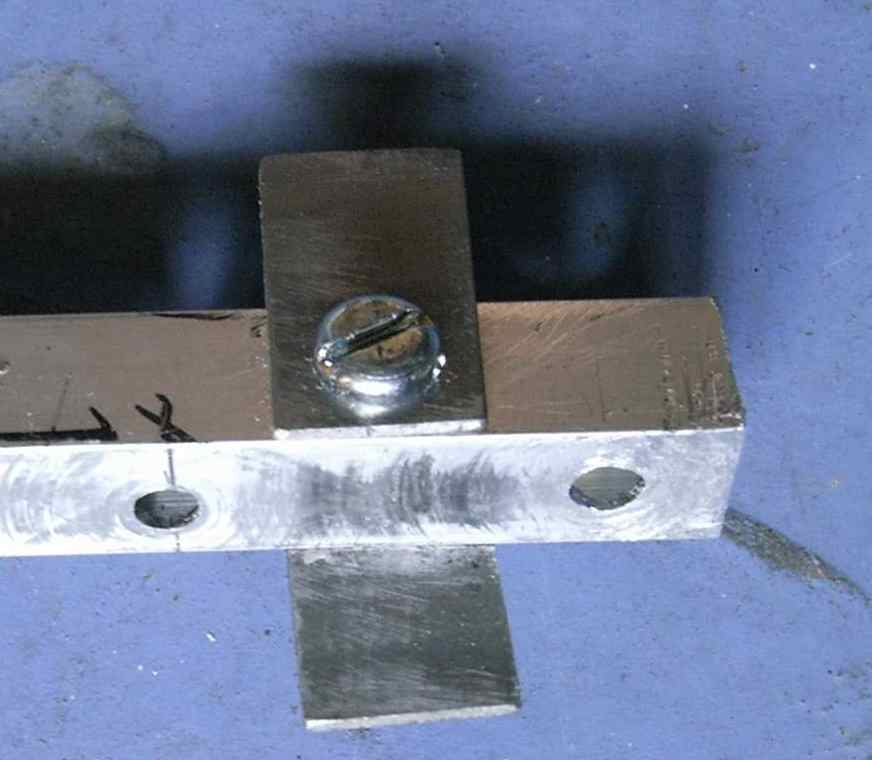
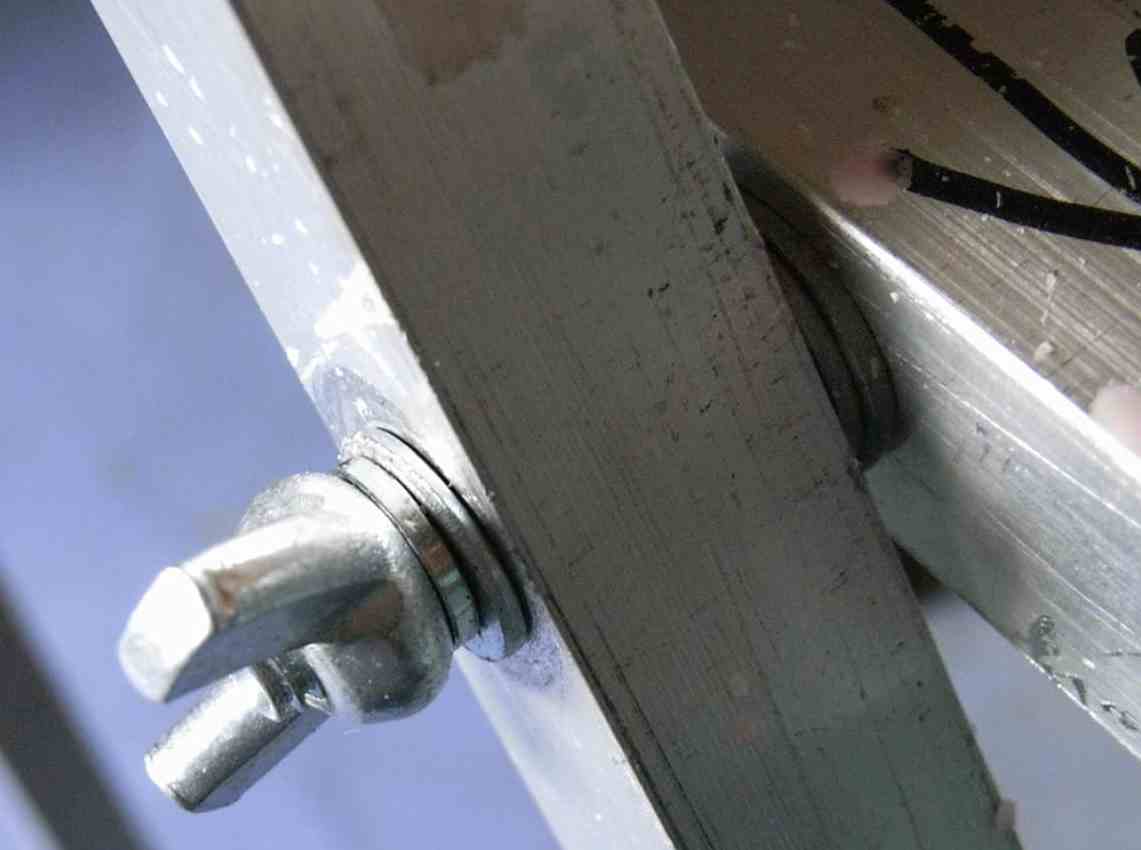
Bolt the Middle Legs to the channel each on the same side as the corresponding Top Leg.
Arrange the leg so that the head of the screw holding the stops to the middle leg points towards the channel.
Use two washers to space the leg from the Channel.
 < /p>
< /p>
When the bench is collapsed for transport, this will give the clearance needed for the head of the screw holding the Foot Stops
Insert bottom of Top Leg into socket of Middle Leg
You may need to file a small angle on the bottom of the Top Leg in order for it fit into the socket. The dimensions of the socket supplied give a good compromise of bench stability and ease of erection. Leave the sockets sufficiently slack to allow the Top Legs to seat fully.
One foot on each leg sits in front of the other. As a result when you view the
Middle Legs from each end of the bench, they are unlikely to be vertical.
File the bottom of feet until the bench stands vertically at both ends.

Drop the ski support bars on to each top leg.If you find the fit of the ski
support bars on to the top of the legs is a bit loose, wrap a turn of insulating
tape around the top of the middle and top legs.
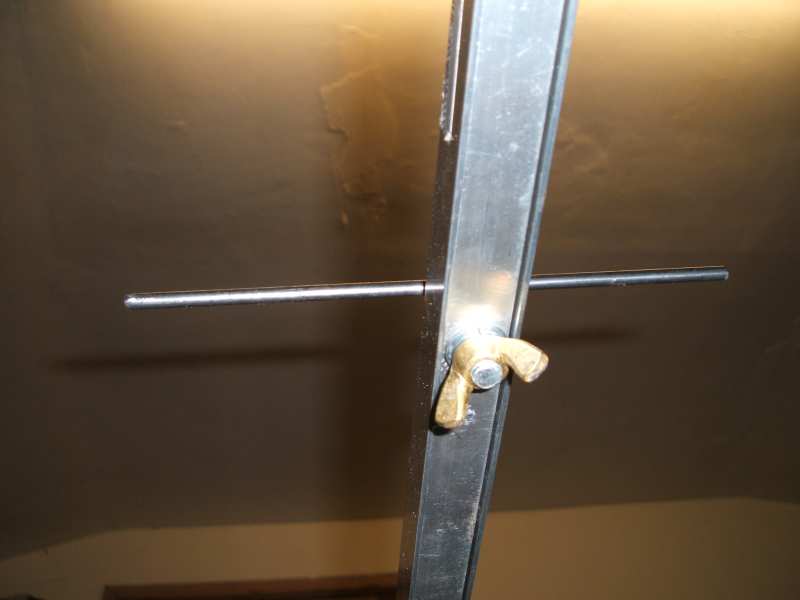
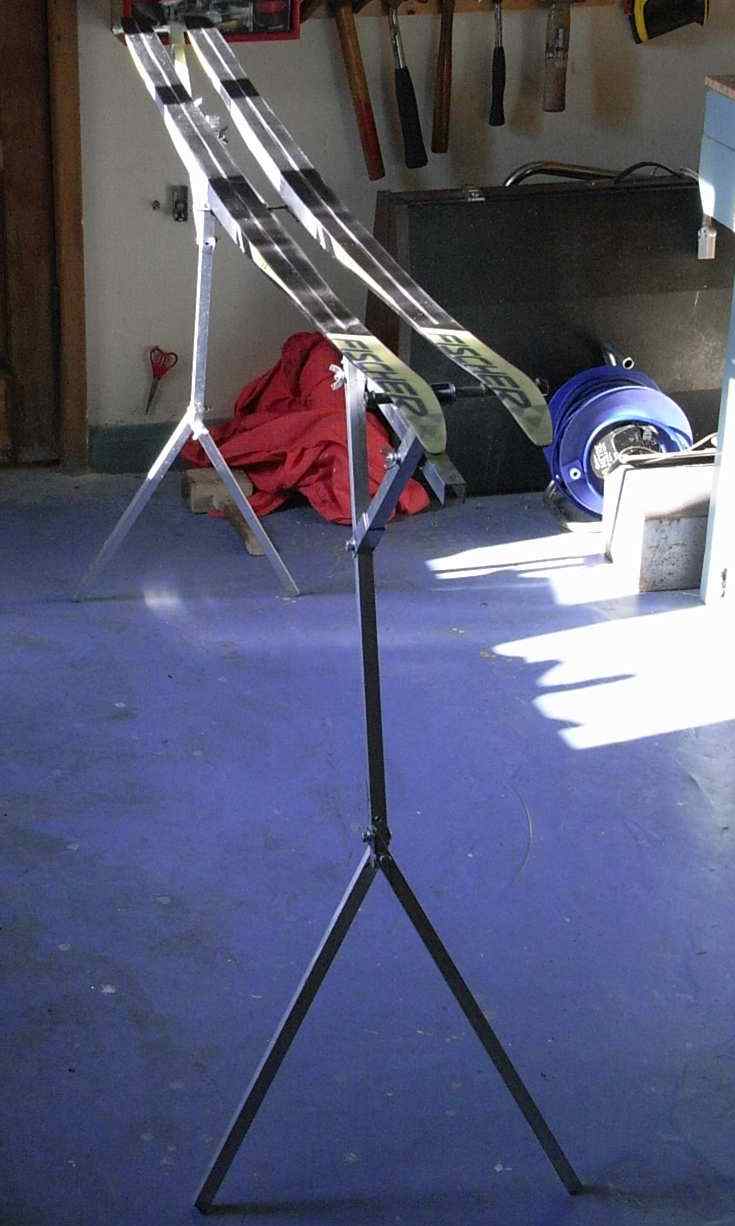
Fit skis to the bench placing the toes and tails over the ski support bars and clipping the ski binding on to the binding bar.
In use it is best to clip both skis to the bench, as the tension from the skis improves its stability.
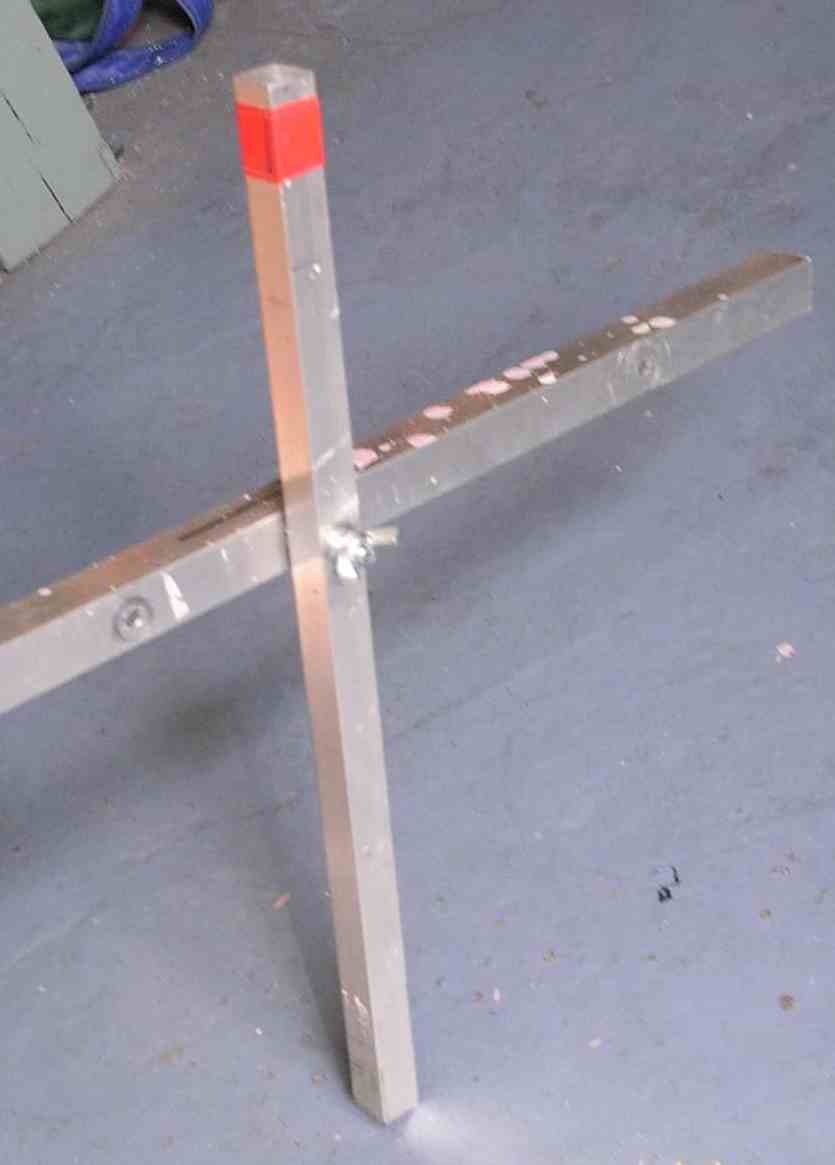
The bench is now complete.
The bench in the folded position held by ski tie
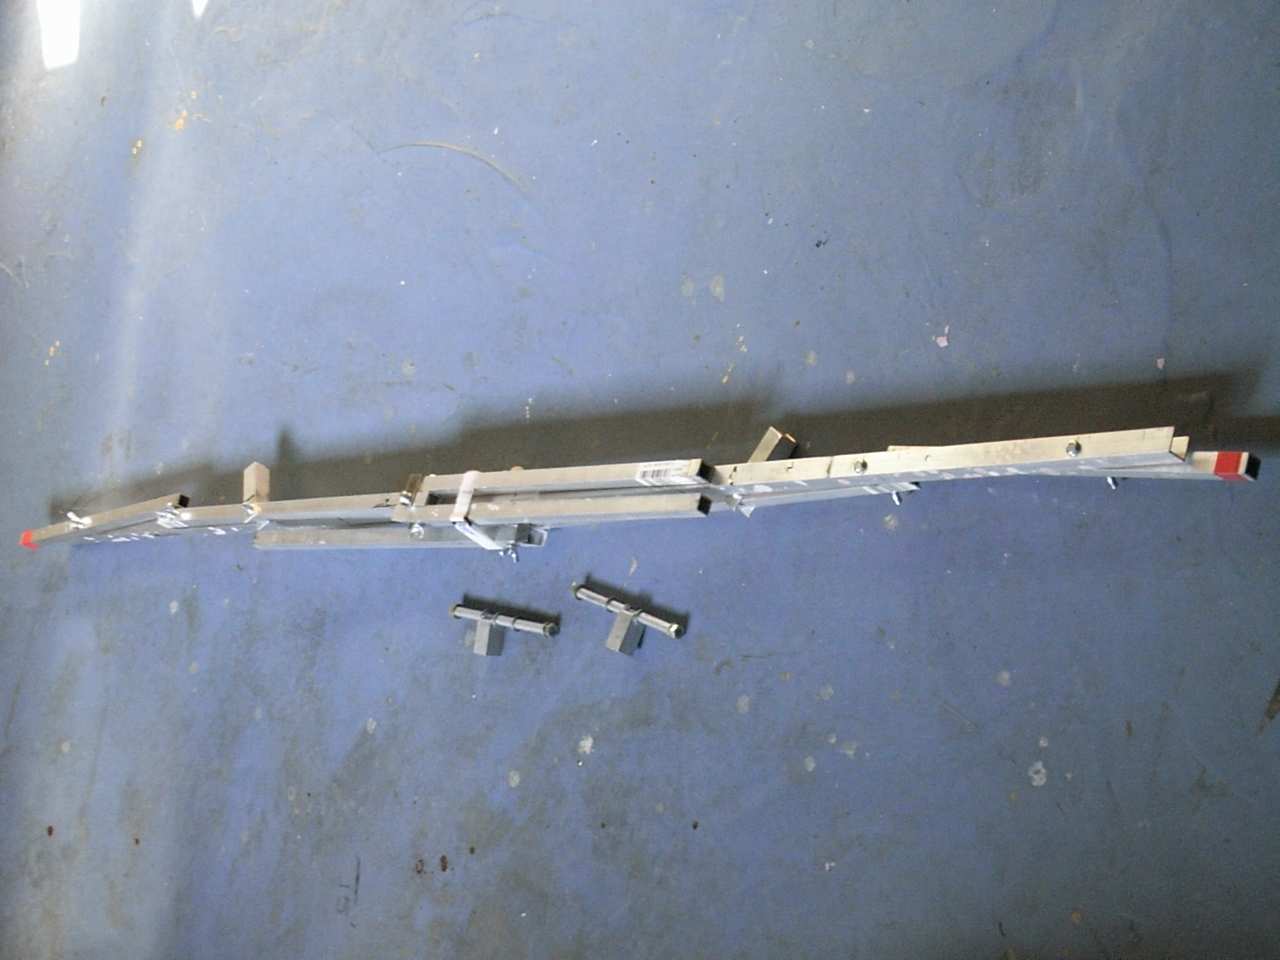
The bench fits into a ski bag alongside the poles and skis. In order to protect your skis from damage by the bench when travelling, wrap the bench in bubblewrap.
Use marker pen on the top of the channel to mark the normal direction that you fit the skis to the bench. You can also mark the start and end of the kick zone for your classic skis. This is easier than searching along the side of the ski for some fading markings.
The detachable Ski Support Bars are an advantage in locations where others just help themselves to your bench. Take the bars away with you and the bench can not be used.